
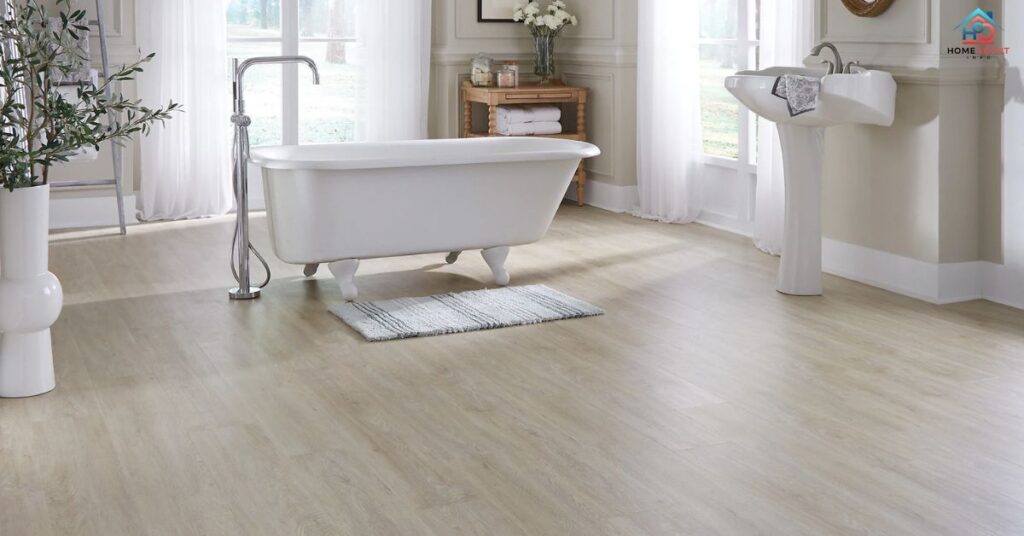
Vinyl plank flooring might be the perfect solution. It is durable waterproof and easy to install making it an ideal choice for bathrooms. In just a few simple steps you can transform your bathroom with a stylish and practical new floor.
First gather your tools and materials including vinyl plank flooring threshold molding and silicone caulk. Then assess your bathroom to determine if any adjustments are needed. Such as lowering the toilet flange or preparing the subfloor.
Once you are ready follow the step-by-step instructions to remove existing flooring prep the subfloor. And lay the vinyl planks and finish with transition pieces and trim. With a little effort and the right guidance you can achieve a professional-looking installation. And enjoy your new bathroom flooring for years to come.
Bathroom
The bathroom serves as a crucial space in any home requiring durable and waterproof flooring solutions to withstand daily use and potential water exposure.
Tools Used
- Husky Knee Pads
- Demo Bar
- Belt Sander
- Tapping Block
- Non-marring Mallet
- Jigsaw
- 13” Vinyl & Laminate Cutter
- ISOtunes Bluetooth Earbuds
Materials/Supplies
- Vinyl Plank Flooring
- Threshold Molding
- Flooring Install Kit
- Quick Clamps
- 100% Silicone Caulk
Does your Bathroom Include a Shower or Bathtub?
Before deciding on installing vinyl plank flooring in your bathroom, consider if it includes a shower or bathtub. These fixtures increase the likelihood of water exposure, making waterproofing measures essential. For bathrooms with just a sink and toilet the process is simpler as there’s less water to contend with.
For full bathrooms with showers or tubs extra precautions are necessary to protect against potential water damage. Assessing the bathroom’s layout and fixtures helps determine the best approach for installing vinyl plank flooring and ensures a durable and long-lasting result.
Is There a Way To Waterproof Vinyl Plank Flooring?
Yes, you can waterproof vinyl plank flooring making it suitable for bathrooms and other areas prone to moisture. If you already have sheet laminate flooring. you can install vinyl plank flooring directly over it, ensuring it is flat and not peeling.
For bathrooms with ceramic tile flooring you will need to remove the tiles level the subfloor and lay the vinyl planks. Adding silicone caulk around the bathtub and between the flooring and tub ensures waterproofing. Remember following manufacturer instructions and proper sealing techniques are essential.
Existing Sheet Laminate Flooring
If your bathroom already has sheet laminate flooring, you can lay vinyl plank flooring directly on top of it, provided it is flat and not peeling up anywhere. Adding silicone caulk in front of the bathtub is recommended.
Existing Ceramic Tile Flooring
For bathrooms with ceramic tile flooring, removing the tiles, underlayment, leveling the subfloor, and then laying vinyl plank flooring is necessary. Adding silicone caulk between the flooring and the tub ensures waterproofing.
Read thid blog : HOW TO GET RID OF PMI ON AN FHA LOAN?
Will you Need to Lower Your Toilet Flange?
Lowering your toilet flange might be necessary. If you are switching from ceramic tile to vinyl plank flooring. your new floor might sit lower.
This height difference can cause your toilet to rock. Consulting a plumber is wise. They can lower the flange or suggest alternative solutions to ensure a stable and leak-free installation.
Step 1: Removing Existing Flooring
Removing existing flooring is the first step in installing vinyl plank flooring. Start by taking out the toilet and any trim in the bathroom. If you’re keeping the vanity, there’s no need to remove it. Use tools like a pry bar and demo bar to carefully lift and remove the old flooring.
It is ceramic tile or laminate. Take your time near the toilet and bathtub to avoid damaging fixtures. Once the flooring is removed, clean up any debris and prepare the subfloor for the new installation. Vacuum thoroughly to ensure a clean surface for the next steps.
Remove Toilet
Start by removing the toilet, along with any trim in the bathroom, for a clean slate before flooring installation.
Remove Trim
Upgrade baseboards by removing existing trim for a fresh look, or keep trim in place and remove only the shoe molding if preferred.
Remove Ceramic Tile Flooring
Carefully remove ceramic tile flooring using appropriate tools, ensuring minimal damage to the subfloor and surrounding fixtures. Vacuum debris thoroughly after removal.
Step 2: Prep Subfloor
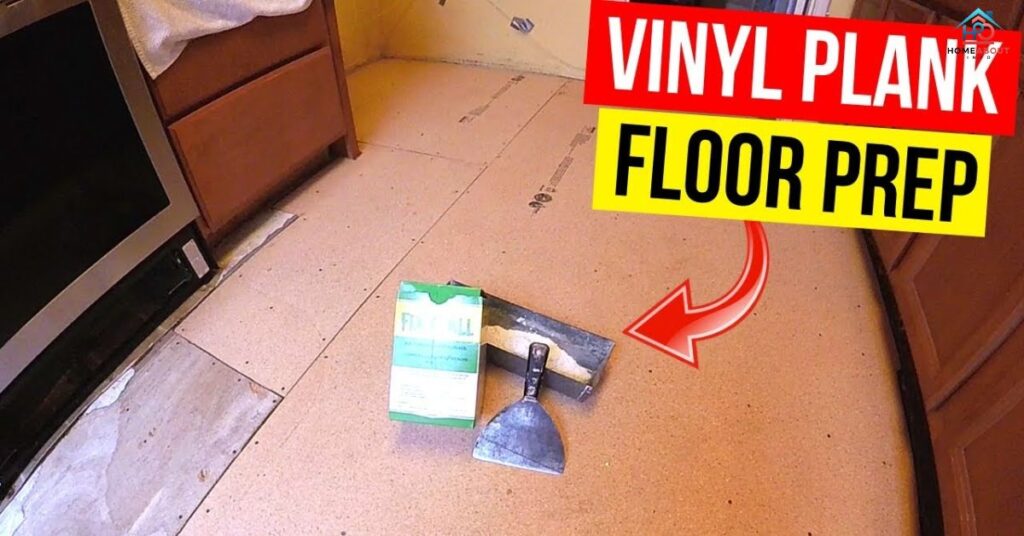
Preparing the subfloor is crucial for a successful vinyl plank flooring installation. First, check the floor for any bumps or uneven areas to ensure a smooth surface. Use a scraper and belt sander to remove any old adhesive or mastic, making sure the subfloor is clean and free of debris.
Next fix any floor seams and check for protruding nails, hammering them below the surface for a flat base. Taking the time to properly prepare the subfloor will result in a stable foundation for your new flooring, ensuring a professional and long-lasting finish.
Check the Floor For Level
Inspect the subfloor for any irregularities and ensure it is level before proceeding with flooring installation.
Remove Mastic
Use a scraper and belt sander to remove any mastic or adhesive residue from the subfloor, ensuring a clean surface for the new flooring.
Fix Floor Seams and Check Nails
Address any uneven seams in the subfloor by sanding them down and ensure all nails are hammered below the surface for a smooth base.
Step 3: Lower Toilet Flange and Add Underlayment
Lowering the toilet flange might be needed if the new flooring makes it too high. This ensures the toilet sits flush with the floor. It’s best to have a plumber handle this job. Another option is to add underlayment to raise the floor level.
Before laying the underlayment apply silicone caulk around the bathtub’s edge. This prevents water from seeping underneath. Then secure the underlayment with staples ensuring it is flat and level. This prepares the subfloor for the vinyl plank flooring installation.
Lower Toilet Flange
Assess the height of the toilet flange in relation to the new flooring and lower it if necessary to prevent rocking or leaks.
Add Silicone Caulk Along Bathtub
Apply silicone caulk along the bathtub edge to create a waterproof barrier before adding plywood underlayment to the subfloor.
Add Plywood to Subfloor
Secure plywood underlayment to the subfloor with staples, ensuring a smooth surface for vinyl plank flooring installation.
Add More Silicone Caulk In Front of Bathtub
Fill any gaps between the plywood underlayment and the bathtub with additional silicone caulk for added waterproofing.
Read this blog also : WHAT IS WC BATHROOM
Step 4: Layout and Install First Row of Tiles
When laying out the first row of tiles, start by planning the layout of the flooring in the room. Use measurements to calculate offsets and minimize small pieces during installation. Ensure the tiles are laid out in a straight line by using a reference line or chalk line along the wall.
Once the layout is planned adjust the tiles to fit the straight reference line making cuts as necessary for obstacles like toilets or vents. Take precise measurements and use a jigsaw or vinyl cutter to make clean cuts in the tiles. Carefully drill holes for water lines and the toilet flange to ensure a precise fit.
Plan Your Layout
Sketch the room dimensions and plan the layout of the flooring, considering cuts around obstacles like toilets and vents to minimize waste.
Adjust Tiles to Straight Reference Line
Use a straight reference line to ensure the first row of tiles is laid straight, adjusting for any wall irregularities as needed.
Drill Holes For Water Lines and Toilet Flange
Carefully measure and drill holes in the tiles for water lines and the toilet flange to ensure a precise fit.
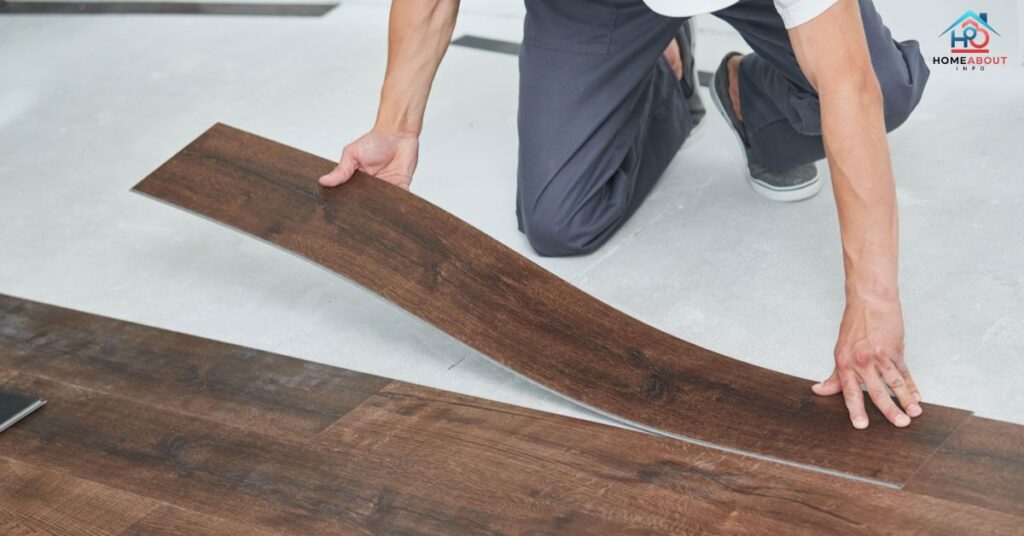
Step 5: Install and Tap Flooring Into Place
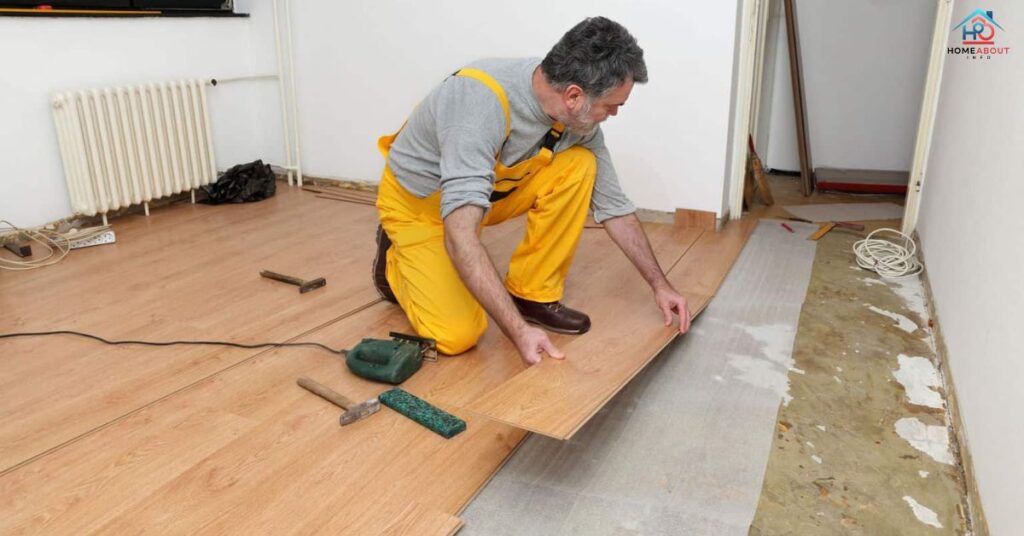
To install the flooring, start by placing the first row of vinyl planks against the wall, leaving a 1/4 inch gap for expansion. Use spacers to maintain the gap along the edges. Then gently tap the planks into place using a rubber mallet and tapping block. Make sure the planks are snugly fitted together to avoid gaps.
Continue installing subsequent rows of vinyl planks, interlocking the tongue and groove edges and tapping them firmly into place. Use a pull bar to help close the gaps along the edges and ensure a tight fit. Work row by row until the entire floor is covered. Finally, remove any spacers and trim the last row of planks to fit.
Install Vinyl Plank Flooring Around Toilet Flange
Cut and install vinyl plank flooring around the toilet flange, ensuring a snug fit for a professional finish.
Tap 2nd Row of Flooring Into Place
Secure the second row of flooring by tapping it into place with a mallet and tapping block, ensuring tight seams between tiles.
Install the Field of Vinyl Tiles
Continue installing subsequent rows of vinyl tiles, ensuring proper alignment and using a pull bar for the final row.
Install Last Row of Vinyl Plank Flooring
Cut the final row of vinyl plank flooring to size and install it, ensuring a 1/4 inch expansion gap along the walls.
Step 6: Install Transition Piece, Trim and Silicone
To finish off the flooring installation it is time to install transition pieces, trim, and apply silicone caulking for a polished look. Transition pieces, such as metal c-channels, are cut to size and secured between different flooring types to create smooth transitions. Trim is then attached to cover expansion gaps along walls and provide a neat finish.
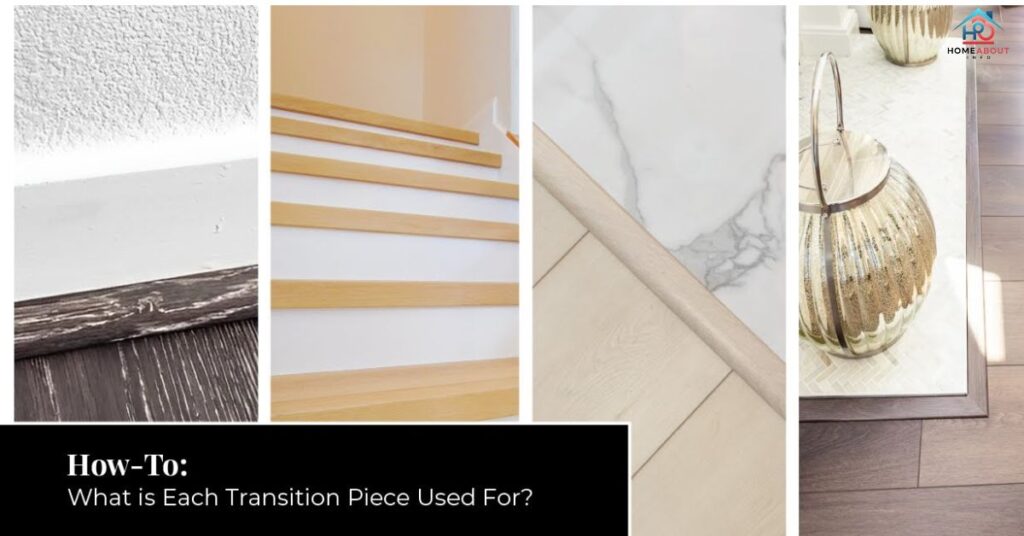
Finally, silicone caulking is applied along edges and seams, ensuring a waterproof seal and adding durability to the installation. This step not only enhances the aesthetics of the flooring but also contributes to its longevity and performance, providing a professional and complete result.
Install C-Channel Strip
Cut and install the metal c-channel strip for transition pieces, ensuring a clean and secure fit between flooring types.
Install Vinyl Plank Flooring Around Door Trim
Cut vinyl plank flooring to fit around door trim, using a jigsaw for precise cuts and ensuring a seamless transition.
Attach Transition Piece
Secure transition pieces in place, ensuring they provide a smooth transition between different flooring surfaces.
Add Silicone Caulk and Attach Trim
Apply silicone caulk along edges and seams for added waterproofing, then attach trim to cover expansion gaps and provide a finished look.
Frequently Asked Questions
Which way do you lay vinyl planks in a bathroom?
Typically, it’s recommended to lay vinyl planks parallel to the longest wall in the room for a visually appealing look.
Can I use vinyl flooring in a bathroom?
Yes, vinyl flooring is a popular choice for bathrooms due to its water-resistant properties and durability.
What do you put under vinyl plank flooring in a bathroom?
In a bathroom, you can put plywood underlayment under vinyl plank flooring to create a smooth and stable surface.
Should vinyl flooring go before or after bathroom fixtures?
It is generally best to install vinyl flooring before bathroom fixtures, such as the toilet and vanity, for a seamless and professional finish.
Can vinyl flooring be used in a shower?
No, vinyl flooring is not suitable for use inside a shower as it may not withstand constant exposure to water and moisture.
conclusion
Installing vinyl plank flooring in a bathroom is a feasible and rewarding project for those looking to update their space. With proper preparation including removing existing flooring and leveling the subfloor along with attention to detail during installation. Such as ensuring tight seams and waterproofing around water sources, homeowners can achieve a professional-looking result.
By following the step-by-step guide and utilizing the necessary tools and materials anyone can transform their bathroom with durable and stylish vinyl plank flooring. Enhancing both aesthetics and functionality for years to come. So whether it is a half bath or a full bathroom vinyl plank flooring offers a versatile and waterproof solution .That’s relatively easy to install, making it a popular choice for modern bathroom renovations.

Ava, boasting five years in home blogging, shares expertise in domestic living. With a sharp eye and passion for details, she navigates home decor and lifestyle intricacies effortlessly.